How to Check the Propane Level for Your Gas Grill in 2025: Top Tools and Tips
Running out of propane mid-cookout is every grill master’s nightmare, but in 2025, there are plenty of ways to ensure that never happens. Whether you’re hosting a backyard barbecue or cooking a simple meal, keeping track of your propane level is key. From advanced digital gauges to easy-to-use manual methods, there’s a tool for every grill enthusiast. In this guide, we’ll explore the top tools and tips to check the propane level for your gas grill, helping you avoid interruptions and cook with confidence. Say goodbye to guessing and get ready to fire up your grill without the worry of running low on gas!
What Does Checking Your Gas Grill Propane Level Mean?
Checking the propane level in your gas grill tank means figuring out how much propane is left so you can plan refills or swaps before you run out. Most gas grills use standard 20-pound propane tanks, which hold about 4.7 gallons of propane when full (weighing 20 pounds, plus the tank’s empty weight of ~17–18 pounds). As you grill, the liquid propane level drops, and without checking, you’re guessing—setting yourself up for a mid-BBQ disaster. Here’s why it’s a big deal:
- Keep the BBQ Going: No one wants half-cooked burgers or a stalled cookout.
- Save Money: Planning refills avoids emergency swaps, which can cost $5–$10 more, per X users.
- Stay Safe: Checking levels helps spot leaks or tank issues, crucial in tight backyard spaces.
From gadgets to hacks, there are plenty of ways to check your propane level. Let’s dive into the best methods.
Why Checking Your Gas Grill Propane Level is Essential
Running out of propane during a BBQ is more than annoying—it can ruin your plans and even pose safety risks. Here’s why staying on top of your propane level is a must:
- Avoid Cookout Crashes: Nothing kills a BBQ vibe like a dead grill. Checking your level ensures your steaks finish cooking.
- Keep Tailgates Hot: At the game, running out means no wings for the second half. A quick check keeps the grill fired up.
- Save Cash: Emergency tank swaps or refills are pricey. X users report saving $10–$20 per refill by planning ahead with a gauge.
- Boost Safety: Spotting leaks early prevents hazards, especially in crowded patios or tailgate setups.
- Plan Like a Pro: Knowing your propane level means you’re always ready for impromptu grill sessions, no stress needed.
Whether you’re grilling for friends, tailgating, or camping, checking your propane level keeps your cookouts smooth and worry-free.
Methods to Check the Propane Level in Your Gas Grill Tank
There are several ways to check your gas grill’s propane level, from high-tech tools to budget-friendly hacks. Let’s explore the most effective methods with step-by-step instructions, pros, cons, and real-world tips.
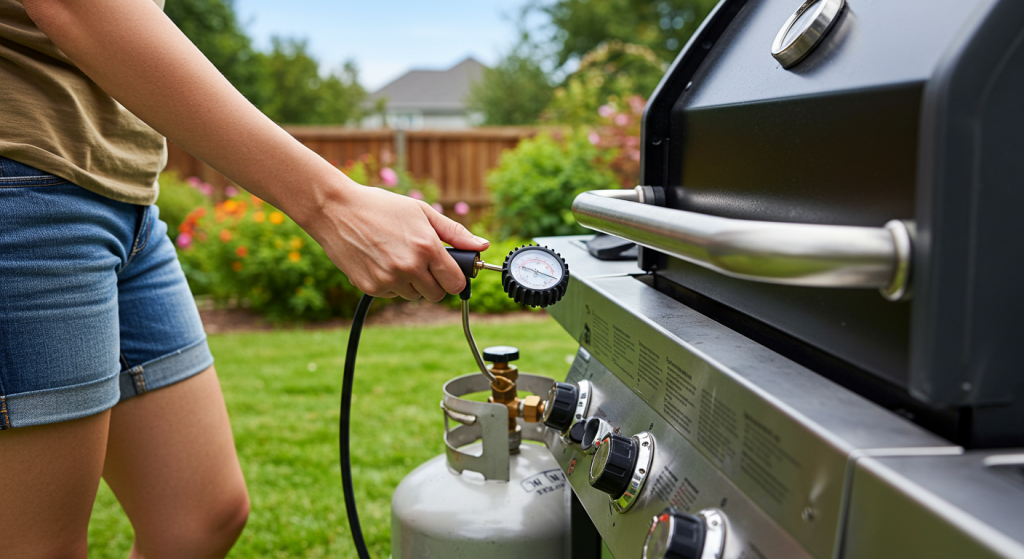
1. Using a Propane Tank Gauge
A propane tank gauge is the go-to for reliable, easy checks. These devices attach to your 20-pound grill tank and give you a clear reading, making them perfect for BBQers and tailgaters.
Types of Gauges
- Mechanical Gauges: Screw into the tank valve and use a float or pressure system to show “full,” “half,” or “empty” on a dial. Budget-friendly ($10–$30) but less precise near empty or in cold weather.
- Electronic Gauges: Use sensors (ultrasonic or pressure-based) for accurate digital readings, sometimes with app connectivity. Mid-range ($50–$150) and great for precision.
- Smart Gauges: Connect to your phone via Bluetooth or Wi-Fi for real-time alerts, leak detection, and usage tracking. Premium ($100–$300+) but ideal for tech-savvy grillers.
- Scale-Based Gauges: Weigh the tank for exact levels—portable but requires lifting ($20–$50). Super accurate but less convenient for frequent checks.
How to Use a Gauge
- Choose the Right Gauge: Ensure it fits your 20-pound tank with a QCC1/Type 1 valve (standard for most gas grills). Check compatibility for aluminum tanks.
- Install It:
- Mechanical/Electronic: Screw into the valve by hand until snug—expect a click from the safety valve.
- Smart: Attach magnetically at the tank’s midpoint (e.g., Mopeka TankCheck) for accurate readings.
- Scale: Hook onto the tank handle and lift to weigh.
- Calibrate (If Needed): For electronic/smart gauges, fill the tank and set to “full” per the manual for pinpoint accuracy.
- Read the Level: Check the dial (mechanical), display (electronic), or app (smart). For scales, subtract the tank’s empty weight (tare weight, ~17–18 pounds) from the total. 1 pound of propane ≈ 0.236 gallons, so a 20-pound tank holds ~4.7 gallons when full.
- Test for Leaks: Open the valve and apply soapy water to connections. Bubbles mean a leak—tighten or seek professional help. Fire up a burner briefly to clear air for accurate readings.
Pros and Cons
- Pros: Reliable, reusable, options for all budgets. Smart gauges offer remote monitoring and safety features like leak detection.
- Cons: Mechanical gauges lack precision; smart gauges are pricey and need connectivity. Scales require lifting the tank.
Example: X users rave about the Mopeka TankCheck smart gauge for its app alerts and 4-year battery life, while the Nexgrill mechanical gauge at Home Depot is a budget hit for casual BBQers.
2. Hot Water Method (DIY)
No gauge? The hot water method is a free, no-equipment way to estimate your propane level using condensation. It’s a classic trick for grillers on a budget.
Steps
- Boil Water: Heat a cup of water to near boiling (~180°F, not scalding).
- Pour Over Tank: Slowly pour the hot water down one side of the tank, from top to bottom, over a clean, dry surface.
- Feel the Tank: Run your hand along the poured area. The tank will feel cool where there’s liquid propane (due to its lower temperature) and warm where it’s empty (gas only).
- Estimate the Level: The cool-to-warm transition marks the propane level. Par exemple, if it’s cool halfway up a 20-pound tank, you’re at ~50% (~2.35 gallons).
Pros and Cons
- Pros: Free, no tools needed, works on any 20-pound grill tank.
- Cons: Rough estimate, not precise, requires caution with hot water. Less effective in extreme heat or cold.
Safety Note: Wear gloves to avoid burns, and never pour boiling water on the valve or connections, as it could damage seals. X users call this a “quick BBQ hack” but prefer gauges for regular use.
3. Weighing the Tank
Weighing your tank is one of the most accurate methods, especially if you have a bathroom or luggage scale. It’s perfect for grillers needing exact measurements before a big cookout.
Steps
- Find the Tare Weight: Check the tank for its empty weight (tare weight), stamped as “TW” (~17–18 pounds for a 20-pound tank).
- Weigh the Tank: Place the tank on a scale and note the total weight. Use a flat surface for accuracy.
- Calculate Propane Weight: Subtract the tare weight from the total. A full 20-pound tank weighs ~37–38 pounds (20 pounds propane + 17–18 pounds tare).
- Estimate Gallons: 1 pound of propane ≈ 0.236 gallons. So, 10 pounds left means ~2.36 gallons (~50% full).
Pros and Cons
- Pros: Highly accurate, works with any scale, no tank mods needed.
- Cons: Requires lifting the tank (~20–38 pounds), less convenient for frequent checks.
Tip: A luggage-scale style gauge like the PBKay Propane Gauge Scale, popular on Amazon, simplifies this. X users love its portability but note it’s a hassle for daily checks.
4. Visual Inspection (If Equipped)
Some grill tanks have built-in gauges or sight glasses (rare for standard 20-pound tanks). If yours has one, it’s a quick way to check the level.
Steps
- Locate the Gauge: Look for a dial or sight glass near the tank valve or top.
- Read the Level: Dials show percentage or gallons; sight glasses show the liquid line.
- Verify Accuracy: Built-in gauges can wear out, so cross-check with another method (e.g., weighing) if readings seem off.
Pros and Cons
- Pros: No extra tools needed, quick if available.
- Cons: Rare on portable BBQ tanks, may be inaccurate if old or damaged.
5. Tapping Method (Least Reliable)
The tapping method is an old-school trick that’s less accurate but can work in a pinch. It involves tapping the tank and listening to the sound to estimate the level.
Steps
- Tap the Tank: Use a small metal object (like a spoon) to tap along the side of the tank from top to bottom.
- Listen for Sound: A dull, solid sound indicates liquid propane; a hollow, ringing sound means gas only.
- Estimate the Level: The transition from dull to hollow marks the liquid level—e.g., dull halfway up suggests ~50% full.
Pros and Cons
- Pros: Free, no tools needed.
- Cons: Highly inaccurate, subjective, not recommended for precise needs. X users call it a “last-ditch effort” compared to gauges or weighing.
Note: This method is unreliable and should only be used if no other options are available. A gauge, hot water, or weighing is far more accurate.
Safety Tips for Checking Propane Levels
Propane is safe when handled properly, but checking levels requires caution. Follow these tips to stay safe:
- Test for Leaks: After installing a gauge or handling the tank, apply soapy water to connections. Bubbles mean a leak—shut off the propane and tighten or seek help.
- Store Properly: Keep tanks upright in a shaded, well-ventilated area away from flames, heat sources, or electrical sparks (e.g., not near the grill’s burner).
- Follow Gauge Instructions: Stick to the manufacturer’s setup, calibration, and maintenance guidelines to avoid errors or malfunctions.
- Avoid Open Flames: Never check levels near a lit grill, cigarette, or campfire.
- Use Gloves for Hot Water Method: Prevent burns by wearing gloves and using near-boiling (not scalding) eau.
- Lift Safely: When weighing, use proper lifting techniques to avoid strain (~20–38 pounds for a 20-pound tank).
- Inspect Regularly: Check tanks monthly for dents, rust, or valve damage, which can affect safety or gauge accuracy. If damaged, contact a professional.
Benefits of Regularly Checking Your Gas Grill Propane Level
Checking your propane level isn’t just about avoiding empty tanks—it’s a habit that pays off big time. Here’s why:
- Uninterrupted BBQs: Keep cookouts and tailgates hot with no mid-grill shutdowns.
- Big Savings: Planning refills avoids emergency swap fees. X users report saving $30–$50 a season with gauges.
- Enhanced Safety: Spotting leaks early prevents hazards in crowded patios or tailgate setups. Smart gauges with leak detection are “game-changers,” per X reviews.
- Better Planning: Know your usage (e.g., 2 pounds per BBQ) to predict refills. Smart gauges track this automatically.
- Peace of Mind: Grill with confidence, knowing you’ve got enough propane for the whole party.
Regular checks are a small effort for major rewards, keeping your grilling sessions hassle-free.
Choosing the Right Method for Your Needs
The best method depends on your grilling habits, budget, and setup:
- Casual Grillers: The hot water method is free and quick for occasional BBQs. A budget mechanical gauge like Nexgrill ($10–$20 at Home Depot) is a solid upgrade.
- Frequent Grillers/Tailgaters: An electronic gauge (like Bernzomatic, $50–$80) or smart gauge (like Mopeka TankCheck, $100+) offers accuracy and convenience. Scales (like PBKay, $20–$50) are great for precision without installation.
- Campers with Portable Grills: Smart gauges or scales are ideal for trips where refills are tricky. Mopeka’s app alerts are a hit with X users for camping.
- Event Hosts: For big BBQs or catering, electronic or smart gauges ensure reliability, so you don’t disappoint a crowd.
Pro Tip: Start with the hot water method or a cheap gauge if you’re on a budget. For frequent grilling or tailgating, invest in an electronic or smart gauge for long-term savings and safety.
Troubleshooting Common Issues
Even the best methods can hit snags. Here’s how to fix common problems:
- Gauge Reads Wrong:
- Mechanical: Cold weather or a stuck float may be the issue. Wait for warmer temps or tap gently. Replace if worn (some last 3–5 years, per Home Depot reviews).
- Electronic/Smart: Recalibrate per the manual. Ensure the sensor’s clean and at the midpoint. Check batteries (lasting 1–2 years, jusqu'à 4 for Mopeka, per X users).
- No Signal (Smart Gauges): Verify Bluetooth range (~30 feet) or Wi-Fi strength. Replace batteries or restart the app/device.
- Leak Alerts: Test with soapy water. No bubbles? Reset the gauge. Bubbles? Shut off the propane and call a pro.
- Hot Water Method Fails: Use hotter water (near boiling) or pour more slowly. Feel carefully for the cool/warm shift—gloves help. Extreme temps can reduce contrast.
- Weighing Issues: Ensure the scale’s on a flat surface and calibrated. Double-check the tare weight (stamped on the tank). Test with a known weight (e.g., 10-pound dumbbell) if unsure.
- Tapping Method Unclear: Sounds are subjective. Cross-check with hot water or a gauge for accuracy.
Maintenance Tip: Clean gauge sensors with a damp cloth to remove grease or dirt. Store tanks in a dry, ventilated spot (e.g., under a grill cover) to prevent rust or damage. Check batteries annually for electronic/smart models.
Real-World Scenarios
Let’s see how these methods work in action:
- The Backyard BBQer: Before a weekend cookout, you try the hot water method and feel the tank’s cool halfway up—enough for today, but you’ll swap soon. You order a Nexgrill mechanical gauge for $15 to simplify future checks.
- The Tailgater: At the game, you weigh your 20-pound tank with a PBKay scale—25 pounds total, so ~7 pounds of propane (~1.65 gallons, 35% full). You’ve got enough for the tailgate but swap post-game.
- The Camper: Grilling at a campsite, your Mopeka smart gauge pings your phone at 20%. You detour to a refill station, avoiding a ruined meal. X users call this a “BBQ lifesaver.”
- The Party Host: Catering a big BBQ, your Bernzomatic electronic gauge shows 60% left, so you’re set for the event but plan a refill for next week, saving $10 over an emergency swap.
- The Frequent Griller: Your CESH Home smart gauge tracks usage (2 pounds per BBQ) and alerts you at 25%, letting you swap tanks before a busy grilling weekend.
These scenarios show how checking your propane level keeps your grilling plans—and your guests’ appetites—satisfied.
Advanced Tips for Propane Management
Take your grilling game to the next level with these pro tips:
- Track Usage: Smart gauges like Mopeka or CESH Home show patterns (e.g., “2 pounds per BBQ”). A 20-pound tank might last ~10 cookouts, helping you predict swaps.
- Keep a Spare: A spare 20-pound tank ensures you’re never out. Swap when your gauge hits 10–20% and refill the empty at your leisure.
- Seasonal Checks: Grilling peaks in summer, so check weekly during BBQ season. Store tanks properly in winter to avoid rust.
- Upgrade to Smart: Tech-savvy grillers love smart gauges for time-saving alerts. X users praise Mopeka’s leak detection for patio safety.
- Inspect Tanks: Monthly checks for dents, rust, or valve damage prevent safety or accuracy issues. If damaged, get a pro inspection.
CESH Home Solutions for Propane Tank Gauges
Ready to make checking your grill’s propane level a breeze? CESH Home’s propane tank gauges are a top pick for BBQers and tailgaters. Their smart gauges are loaded with features:
- Smart Tech: Ultrasonic sensors deliver precise readings, synced to an intuitive app. Check levels while grabbing more BBQ sauce.
- Safety First: Leak detection and auto shut-off protect your patio or tailgate, a must for crowded setups.
- Easy Setup: Magnetic mounts snap on in seconds—no tools needed.
- Durable Design: Built to handle rain, heat, and grease, perfect for outdoor grilling.
- Stellar Support: 24/7 help and a solid warranty keep you covered.
CESH Home’s gauges are a hit on X for their reliability and “set-it-and-forget-it” convenience. They’re perfect for grillers who want to focus on cooking, not fuel worries.
FAQs About Checking Gas Grill Propane Levels
Got questions? Here’s the lowdown:
- How accurate are propane tank gauges?
Mechanical gauges give rough estimates; electronic/smart ones are precise (1–2%). Scales are the most accurate by weight. - Can I check without a gauge?
Yes! Hot water or weighing methods work, but they’re less precise or more effort than gauges. - Do smart gauges need internet?
Bluetooth works locally (~30 feet); Wi-Fi models need a signal for remote checks. - Will gauges fit my grill tank?
Most fit 20-pound tanks with QCC1/Type 1 valves. Check specs for aluminum tanks. - How do I know my gauge is working?
Fill the tank and check—it should read “full.” If not, recalibrate or reposition. - How long do gauge batteries last?
1–2 years for electronic/smart gauges; Mopeka can hit 4 years, per X users. - What if my gauge shows a leak?
Test with soapy water. Bubbles mean a leak—shut off the propane and get help. No bubbles? Reset the gauge.
Conclusion
Checking the propane level in your gas grill tank is a small step that saves big headaches, keeping your BBQs, tailgates, and camping meals on fire. From budget-friendly Nexgrill mechanical gauges to high-tech CESH Home smart models, there’s a method for every griller. Want to grill like a pro? Visit CESH Home’s website, grab a smart gauge, and keep your propane flowing. Now, light that grill and get cooking!