The Ultimate Guide to Smart Propane Monitoring for RVs (And How to Actually Stay Safe in 2025)
There is no sound more dreaded in an RV than the click-click-click of your furnace trying to ignite at 2 AM on a cold night.
It means one thing: you're out of propane. Again.
The manual "Full/Low" gauge on your tank is a notorious liar. It's basically useless. You're tired of guessing, tired of shaking the tank, and tired of hauling a half-full cylinder to the refill station "just in case." You just want a smart, app-based way to know exactly how much you have left.
But your search for "Stay Safe" reveals a bigger, more important truth: most guides completely botch this topic. They confuse the convenience of not running out of fuel with the critical safety of not having a leak.
This guide solves both problems.
We're not just going to review the best smart propane monitors. We're going to give you a complete system for total propane peace of mind, starting with the one crucial difference every other guide forgets.
First: Convenience vs. Safety (What Competitors Won't Tell You)
Alright, let's get this straight, because it's the most important part of this entire guide.
Your RV's propane system has two completely different problems:
- The Convenience Problem: "How much fuel do I have left?"
- The Safety Problem: "Is any of this explosive gas leaking into my rig?"
A Smart Level Monitor (what this guide is about) only solves the first problem. Its job is to tell you how much propane is left in your tank. That's it. It’s a convenience tool that stops you from running out of fuel while you're cooking or when the furnace is on.
A Propane Leak Detector / CO Alarm solves the second problem. This is the little alarm (usually near your floor) that's hard-wired into your RV. Its job is to sniff the air inside your rig, 24/7. If it detects leaking propane, it screams at you. This is the device that prevents a fire or explosion.
A level monitor is NOT a safety device.
Here’s the simple breakdown:
| Feature | Smart Level Monitor | Propane Leak Detector |
| Main Job | Measures how much fuel is left | Detects gas leaks |
| Benefit | Convenience (Never run out) | Safety (Prevents explosions) |
| Location | On the propane tank (outside) | Inside your RV (near the floor) |
| Alert | A notification on your phone | A loud, 85dB alarm |
You absolutely need both.
In this guide, we're going to find you the perfect level monitor for convenience. Then, at the end, I'll give you a simple checklist to make sure your safety system is tested and working perfectly.
Deal? Let's move on.
How Smart Propane Monitors Actually Work (The Tech Explained)
First off, why are the gauges on your tanks so bad? It's simple: they're just cheap float gauges, like the one in your car's gas tank (or, more accurately, like a toilet tank float). When the liquid propane sloshes around, or when it's cold, the float gives a wild guess. It's 1950s tech.
Smart monitors are a different beast entirely. They don't guess, they measure. There are two main technologies you'll find.
Sensor Type 1: Ultrasonic (The "Stick-On" Sensors)
This is the most common type you'll see from brands like Mopeka and Lippert.
- How it Works: It's a small, magnetic "puck" that you stick to the bottom of your propane tank. It works like a tiny submarine's sonar: it sends an ultrasonic sound wave up into the tank, waits for it to hit the surface of the liquid propane, and measures the echo. From that, it calculates the exact liquid level.
- Pros: Super easy to install (it's magnetic), non-invasive (you don't open any gas lines), and relatively affordable.
- Cons: It must have a clean, rust-free surface to get a good signal. It requires small spacers (risers) to create a gap under the tank. And, this is a big one, it only works on steel tanks. It won't work on the aluminum tanks common on Airstreams (unless you get a special "universal" model).
Sensor Type 2: Hard-Wired Probes (The "Integrated" Systems)
This is the high-end, "pro-level" option, dominated by brands like Garnet (SeeLevel).
- How it Works: This isn't a simple sensor. It's a flexible circuit board "strip" that you attach to the side of the propane tank. It's then wired directly into a new, upgraded monitor panel inside your RV. It reads the propane level as a percentage from top to bottom.
- Pros: It is extremely accurate. Better yet, these systems are almost always "all-in-one," meaning they come with new probes for your fresh, gray, and black tanks, too. You get one single, accurate panel for all your tank levels.
- Cons: It's expensive. It also requires a much more involved installation—you're drilling holes and running wires. This isn't a 5-minute stick-on job; many people opt for a professional install.
Bluetooth vs. Wi-Fi vs. Cellular: Which Connectivity Do You Need?
So you've narrowed down your sensor type (stick-on vs. hard-wired). Now you have to answer the next, and maybe most important, question: How do you want to read the data?
This is all about your personal RVing style.
Bluetooth (For At-RV Checks)
This is the simplest and most common option. The sensor on your tank talks directly to your phone via Bluetooth.
- Use Case: You have to be near your RV—usually within 30-50 feet—to get a reading. It's for checking your levels from the driver's seat before you pull out, or from your camp chair, or from inside the rig before you go to bed.
- Best For: Weekend warriors, boondockers who are "off-grid" without internet, and anyone who just wants a simple, reliable check without any fuss.
- Pros: Super simple setup, no internet required, uses the least amount of sensor battery.
- Cons: Limited range. You can't check your tanks from the beach or from home.
Wi-Fi (For Remote Checks at Camp)
This option takes the Bluetooth signal and "bridges" it to your RV's Wi-Fi network (like your Starlink, peplink, or campsite internet).
- Use Case: As long as your RV's internet is on, you can check your propane levels from anywhere you have a signal. You can be in town grabbing groceries or down at the lake and still see what your tanks are doing.
- Best For: Full-timers and tech-savvy RVers who already have a dedicated, always-on internet setup in their rig.
- Pros: True remote monitoring while you're camping.
- Cons: It's useless if your RV's Wi-Fi is off. It also uses more sensor battery and can be more complex to set up.
Cellular/LTE (For True Remote Monitoring With Fees)
This is the most powerful option. The monitor has its own cellular (SIM card) connection, just like your phone. It doesn't need your Wi-Fi at all.
- Use Case: You can check your propane levels from 1,000 miles away. This is the go-to for people who store their RV in cold climates and leave the furnace on low—they can check the tanks from their couch at home all winter.
- Best For: RV storage monitoring, fleet owners, or anyone who wants 100% remote access, anytime, anywhere.
- The Big "Gotcha" (Trust): This is the one you have to watch out for. Because it has its own cell connection, this type always requires a monthly or annual subscription fee to pay for that data. Don't be surprised by it!
- Pros: Truly "check from anywhere" monitoring.
- Cons: The recurring subscription cost.
The 5 Best Smart Propane Monitoring Systems for RVs in 2025
Okay, you know the types of tech and the connectivity options. Now for the fun part: which one should you actually buy?
How We Evaluated: We didn't just read the marketing copy. We dug through hundreds of real-world RVer reviews, analyzed app store ratings for bugginess, and scoured installation manuals to find the "gotchas" and pain points that manufacturers don't put on the box.
Here are the best, broken down by who they're for.
1. Mopeka Pro+ (Best Overall for Simplicity & Accuracy)
- The Review: This is the one you'll see most often, and for good reason. It's a small ultrasonic puck that slaps onto the bottom of your steel tank and connects to your phone via Bluetooth. The app is solid, supports multiple tanks (including a "Mopeka Check" for non-smart tanks), and is known for being very accurate. It just works.
- Who it's for: This is the default, 90%-of-people-should-buy-this solution. If you have standard steel tanks and just want to know how much propane you have, this is your answer.
- The "Gotcha": It's not quite "slap it on and go." For an accurate reading, you must use dielectric grease on the sensor foot. And because it sits on the bottom, you must add small rubber spacers (risers) to your tank tray to create a gap, otherwise the tank's metal collar will crush the sensor. (More on this in the install section!)
2. Lippert OneControl (Best for an Integrated Lippert System)
- The Review: The sensor itself is a decent ultrasonic, Bluetooth puck, very similar to the Mopeka. Its only real selling point is that it's designed to talk directly to the Lippert OneControl app—the one that might already run your RV's slides, awnings, and leveling jacks.
- Who it's for: This is only for owners of modern RVs who are already all-in on the Lippert OneControl ecosystem and want one less app on their phone.
- The "Gotcha": If you don't already use OneControl, don't bother. The standalone Mopeka app is simpler, faster, and more reliable for just checking tanks.
3. Garnet SeeLevel II 709-BTP3 (Best All-in-One Integrated System)
- The Review: This is the gold standard. The Garnet SeeLevel isn't just a propane monitor; it's a complete replacement for your RV's entire horrible, inaccurate tank panel. It uses hard-wired probe strips to give you percentage-point accuracy on your fresh, gray, black, and propane tanks, all on one sleek, modern display. This specific model (BTP3) also adds Bluetooth.
- Who it's for: This is the "buy it for life" solution for full-timers, serious boondockers, and anyone building or remodeling a rig who wants the absolute best, most integrated system.
- The "Gotcha": This is a major upgrade, not a 5-minute install. It requires wiring, drilling, and a fair bit of DIY confidence (or a professional installer). It's also, by far, the most expensive option.
4. Mopeka Universal (The Only Choice for Aluminum Tanks)
- The Review: This looks different from the standard Mopeka sensor. It's designed specifically for non-steel tanks. It still uses ultrasonic tech but comes in a special retaining collar that holds it firmly against the bottom of an aluminum or composite tank.
- Who it's for: Airstream owners. That's pretty much it. If you have those shiny aluminum tanks, this is your only reliable ultrasonic option.
- The "Gotcha": Do not buy the standard Mopeka Pro+ for your Airstream's aluminum tanks. It's magnetic. It won't stick, and even if you tape it on, the readings will be all over the place. You must get the Universal.
5. BMPRO SmartSense (Best for BMPRO RV Systems)
- The Review: Just like the Lippert sensor, this is an ecosystem play. It's an ultrasonic, Bluetooth sensor designed to feed its data directly into the BMPRO or JayCommand system (common in Jayco and Newmar RVs).
- Who it's for: Owners of Jayco, Newmar, or other brands who are already using the BMPRO system to control their RV.
- The "Gotcha": User reviews on this specific sensor are more mixed than for Mopeka. Common complaints include a shorter-than-advertised battery life and slightly buggier app connectivity.
Real-World Accuracy Test
Don't just take our word for it. It's one thing to see a percentage on an app; it's another to prove it. Watch this fantastic real-world test from RVer EddieAtLarge on YouTube. He weighs his tanks and compares the actual weight to what the Mopeka sensors are reporting. This is the kind of E-E-A-T (Experience and Expertise) that matters.
How to Install Your Smart Propane Sensor (The Right Way)
You've got your sensor. Great. Now, let's install it so it actually works.
This 5-minute job is where 99% of bad reviews come from, and it's almost always from people skipping one of these steps. Don't be that person. This guide will get you an accurate reading the first time.
(We're focusing on the common ultrasonic "puck" sensors like the Mopeka or Lippert. If you bought a hard-wired SeeLevel system... good luck, and read the manual!)
1. Check Your Tank Material (Steel vs. Aluminum)
This takes two seconds. Take your new sensor (which is magnetic) and try to stick it to your tank.
- If it sticks: You have a steel tank. Proceed to Step 2.
- If it falls off: You have an aluminum tank. STOP. The standard sensor will not work for you. You must return it and get the Mopeka Universal model.
2. Prepare Your Tank (The Step 99% of People Skip)
The sensor uses sound waves. It needs a clean, flat surface to send that signal.
Take the tank out. Turn it over. Look at the bottom. Is it dirty, caked with road grime, or covered in rust flakes? Of course it is.
Take a rag (and maybe a little Simple Green) and thoroughly clean the bottom center of the tank. If you have flaky rust, use a wire brush or sandpaper to get down to a smooth, solid metal surface. If you skip this, your readings will be all over the place.
3. Solve the "Riser" Problem (The #1 Installation "Gotcha")
This is it. This is the single most important "secret" to making these things work.
Look at your RV's propane tray. Now look at your tank. The tank rests on a metal collar or ring at the bottom, right? The sensor you're about to attach is about 1/4-inch thick and sticks to the flat center... which is inside that collar.
If you just stick the sensor on and put the tank back, the tank's weight will rest on the sensor, not the collar. It will either crush the sensor or give a terrible reading.
You MUST create a gap.
- The Solution: Go to a hardware store and buy a pack of small, 3/8-inch-thick rubber feet or furniture pads.
- The Action: Stick 3 or 4 of these rubber feet on your RV's tank tray, outside of where the sensor will sit.
- That's it. These risers will lift the tank's collar just enough to create a perfect, 1/4-inch pocket of air for your sensor. It will never be crushed or touched.
4. Apply Dielectric Grease & Attach the Sensor
You're almost there. To get a perfect, gap-free signal, you need a "coupler." Don't worry, it's cheap: dielectric (or silicone) grease.
- The Action: Put a generous dab of the grease right on the center "foot" of the sensor. Don't be shy with it.
- The Attachment: Press the sensor firmly onto the clean, center spot on the tank's bottom. The magnet will hold it, and the grease will fill in any microscopic air gaps.
5. Sync With the App & Calibrate
Before you heave that tank back into the RV, let's make sure it's working.
- The Action: Open the sensor's app on your phone (Mopeka, OneControl, etc.).
- The Sync: Follow the instructions to add a new sensor. It should pop up via Bluetooth immediately.
- The Calibration: In the app, make sure to set the tank type (e.g., 20 lb or 30 lb) and orientation (vertical).
Once you see a percentage reading on your phone, you're golden. Carefully place the tank back onto its tray (making sure it's resting on your new risers, not the sensor), hook up your gas line, and enjoy knowing exactly how much propane you have.
Your Complete 3-Point Propane Safety Checklist (The "Stay Safe" Plan)
Okay, your new smart monitor is installed, and your "convenience" problem is solved forever. You'll never run out of propane unexpectedly again.
Now, let's spend 10 minutes solving the "safety" problem.
This is your simple, an-RVer-should-do-this-twice-a-season checklist for making sure your system is safe, not just convenient.
1. Monitor (The "Convenience" Check)
- Action: You just did this! You installed your new smart propane level monitor.
- Result: You have 100% visibility into your fuel levels from your phone. Convenience, check.
2. Detect (The "Inside Safety" Check)
This is the one that saves lives. You need to trust that little alarm inside your rig.
- Action: Find your indoor Propane/CO Detector. It's usually near the floor (since propane is heavier than air) in your kitchen or sleeping area.
- Test it: Press and hold the "Test" button. It should give a loud, obnoxious beep (or series of beeps). If it doesn't, it's not working.
- Check the Date (The REAL Pro-Tip): This is what almost everyone forgets. These sensors expire. They are only good for 5-7 years. Look at the back of the unit. There will be an "End of Life" (EOL) or "Replace By" date printed on a sticker.
- Result: If the date is in the past, or it fails the test, replace it today. No excuses. This is your only warning for an invisible leak. Safety, check.
3. Inspect (The "Outside Safety" Check)
This is a quick, 5-minute visual check.
- Action: Go back to your propane compartment. Visually inspect the black rubber hoses coming from your tanks. Gently bend them. Are they brittle, cracked, or frayed?
- The Soapy Water Test: Open your propane tanks. In a spray bottle, mix some dish soap and water. Spray the solution on the metal fittings and connections (where the hose connects to the tank and the regulator).
- Result: If you see new bubbles forming or growing, you have a small gas leak. Shut off your tanks and get that fitting or hose replaced. If you see no bubbles and the hoses look good, you're all set. Maintenance, check.
Download the Free Checklist: Want this in a simple, one-page PDF you can keep in your RV's junk drawer? Click here to download our free RVer's Propane Safety & Monitoring Checklist.
Frequently Asked Questions (FAQ)
Here are some of the most common, specific questions we hear from RVers about these sensors.
No, most common sensors (like the Mopeka Pro+) are magnetic and designed for steel tanks only. If you have an Airstream or any RV with shiny aluminum tanks, you must buy a special "universal" model, like the Mopeka Universal Sensor, which is designed to be attached to non-steel tanks.
Yes, they're designed to. The ultrasonic technology itself isn't affected by the cold. The only thing to be aware of is that very extreme cold (we're talking -20°F or colder) can shorten the life of the small CR2032 coin-cell battery inside the sensor. But for all normal winter camping, you'll be fine.
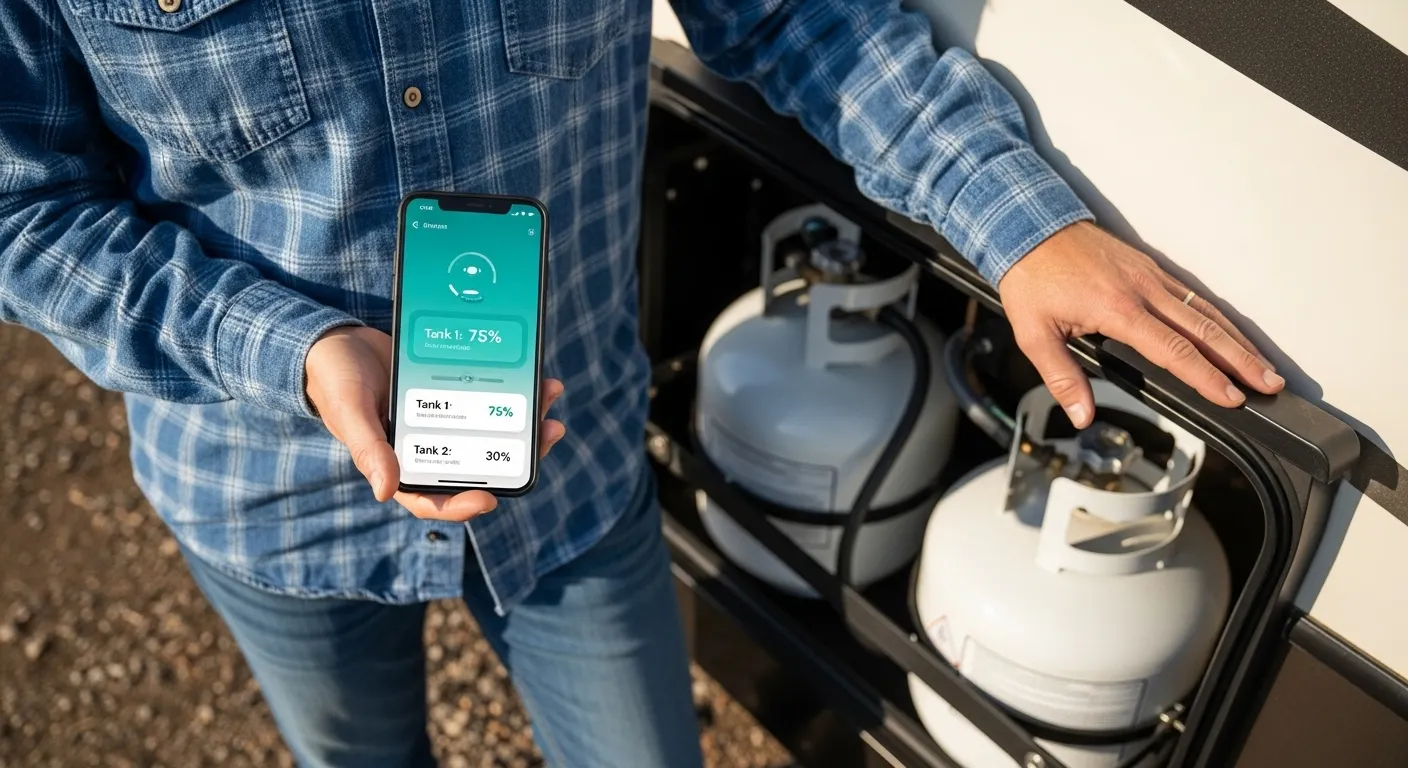
Absolutely. All the major apps (Mopeka, Lippert, BMPRO) are built for this. RVs have two tanks, and these apps are designed to let you add and name multiple sensors. You'll see "Tank 1: 80%" and "Tank 2: 30%" right on the same screen.
You can typically expect 6-12 months from a single battery, but it depends on temperature and how often the sensor reports. Most of these "puck" sensors use one CR2032 coin-cell battery, which is cheap and easy to replace.
YES, you 100% need them for any ultrasonic sensor that sticks on the bottom. They are small rubber feet or plastic blocks that you put on your RV's tank tray. They lift the tank's outer metal collar up by about 1/4-inch, creating a pocket of space so you don't crush the sensor. This is the #1 step people miss.
NO. This is the most important question. A monitor (on the tank) tells you how much propane is left (convenience). A detector (inside the RV) sniffs the air for gas leaks (safety). You MUST have both.
Conclusion: Your Newfound Propane Peace of Mind
Choosing a smart propane monitor is, honestly, one of the single best quality-of-life upgrades you can make to your RV. It’s the official end of "propane anxiety." It’s the first and most important step in building a complete system for both convenience and safety.
So, here's the final verdict:
For 9 out of 10 RVers who just want to solve the problem with standard steel tanks, the Mopeka Pro+ is the winner. It offers the best-in-class balance of accuracy, price, and app quality.
If you're a full-timer, a serious boondocker, or you're just in the mood to upgrade your entire rig's terrible monitoring panel, the Garnet SeeLevel II is the undisputed, gold-standard solution.
Whichever path you choose, you can finally stop guessing. You can stop shaking tanks and stop worrying about that 2 AM furnace cutoff. You can just... know. You're set to start RVing with true, data-driven peace of mind.
Don't forget the final step! Make sure your rig is truly safe for the season ahead.
What monitor do you use? Did we miss your favorite, or do you have an installation tip to share? Leave a comment below and help out the rest of the community!